


Long Hair Drawing Guide For Beginners [3 Styles, Video + Images]
![A collage of three images showing finished long hair drawings. Image used in the “Long Hair Drawing Guide For Beginners [Video + Images]” blog post.](https://2023.biowars.com/blog/wp-content/uploads/2023/01/long-hair-drawing-hero-image-635x303.jpg)
Discover how to draw long hair!
Did you know that hair is the second fastest-growing tissue in the body? Only bone marrow grows faster.
On average, your hair grows around ½ inch per month.
Whether you’re drawing a self-portrait, a creative comic book character or your best friend, learning how to dry long hair the easy way can help bring your sketch to life! We’ll show you the steps to easy long hair drawing, including:
- Long hair with and without bangs
- A long, layered hairstyle
Uncover the battle raging within. Read the BIOWARS comic book for free!
Watch BIOWARS Artist’s Video On Easy Long Hair Drawing
A professional comic book artist and the lead BIOWARS illustrator, Goncalo Lopes, created an easy-to-follow video guide on long hair drawing:
We also created a set of illustrations you can explore for step-by-step instructions on how to draw three hairstyles for long hair.
For more drawing tutorials, explore our how-to-draw posts, including our beginner-friendly tutorial on how to draw hair or the easy anime drawing guide.
And don’t forget to check out the exciting story of BIOWARS and read all about the never-ending battle between the warriors of the immune system — the BIOWARRIORS — and the pathogens that attack it!
Check out how we drew the BIOWARS comic book protagonists!
Sketching Tools For Long Hair Drawing
Tools you might want to use for your long drawing include:
- An H pencil: A hard lead leaves a light trace on the paper, so an H pencil is a good choice for sketching — you can easily erase mistakes but also enhance the lines once you create your basic long hair sketches.
- An HB pencil: A medium-hard lead is ideal for enhancing lines, adding details and soft shading.
- A 4B pencil: B pencils are soft and dark, especially with the 4B mark. They’re ideal for shading and creating dark grey/black hues.
- A kneaded eraser: It’s good to have a kneaded eraser in store since you can easily change their shape depending on what you want to erase.
- Lightly textured sketch paper: This paper’s soft surface is perfect because your pencil can easily glide over it, for smooth and easy sketching.
Remember — these are just recommendations. Feel free to stick to the pencils you enjoy drawing with!
Follow us on Instagram for more drawing tips and the latest BIOWARS updates!
How To Draw Long Hair Without Bangs In 3 Steps
Let’s first explore the steps to drawing long hair without bangs.
(By the way, if you need help drawing faces, explore our simple guide on face drawing. We also have a tutorial on drawing head angles, so you can go through it if you’re not sure how to best position your character’s head.)
1. Outline The Hair
Recommended tools: H pencil
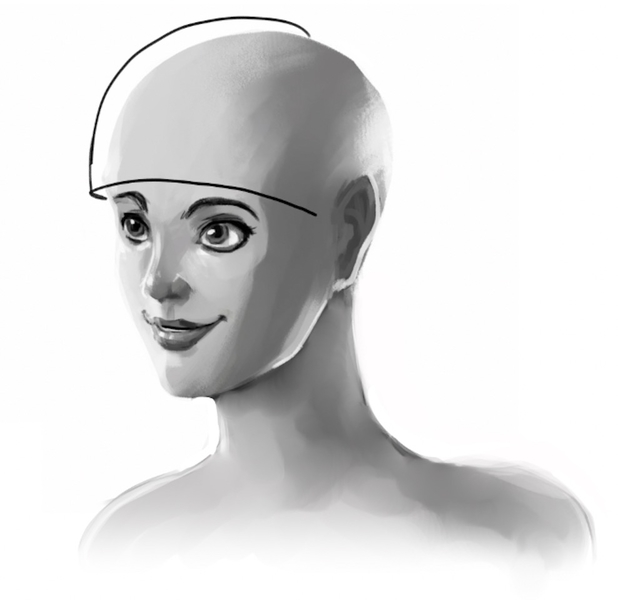
To draw long hair without bangs, let’s start by adding a line on top of the head, that follows the shape of the character’s head.
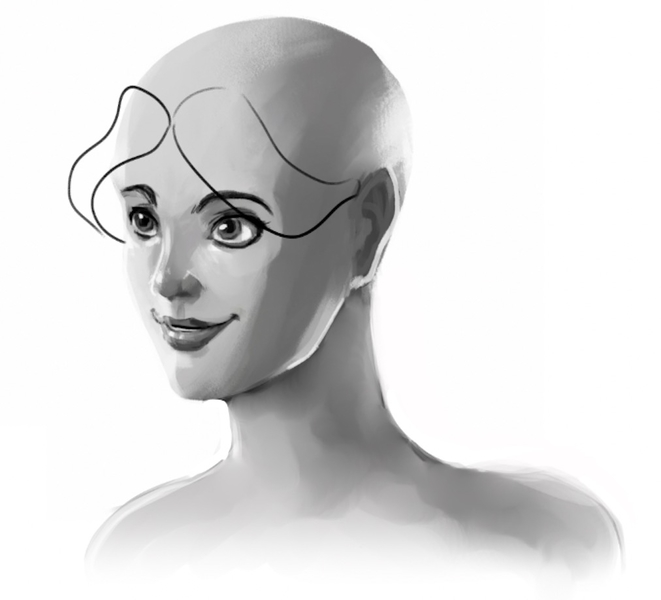
Start from just above the eyebrows, and draw the line so that it slightly dips toward the head crown. The line should resemble a wide “M:”
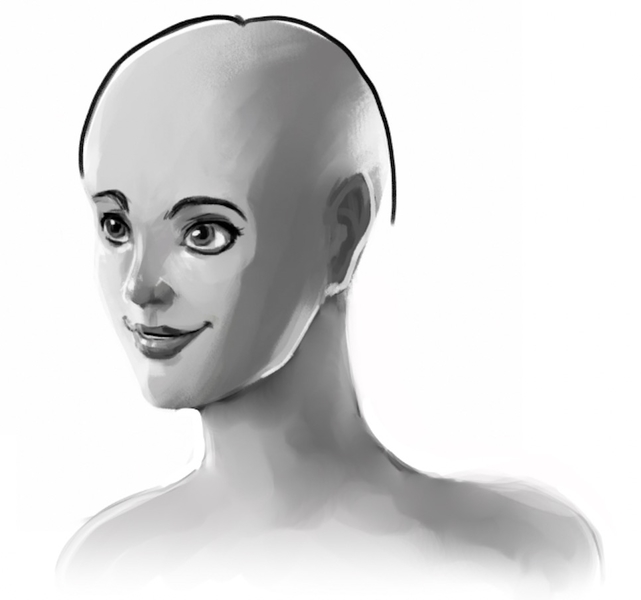
Draw a line that follows the head shape.
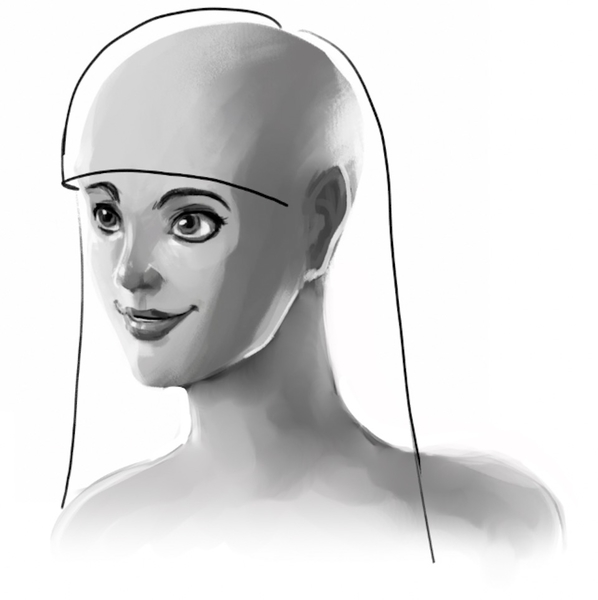
Since this girl won’t have bangs, we’ll draw her with her hair tucked behind her ears.
Now, let’s draw a large “V” that frames her face, starting from her right cheekbone; make sure the line ends right below the girl’s left ear lobe, like this:
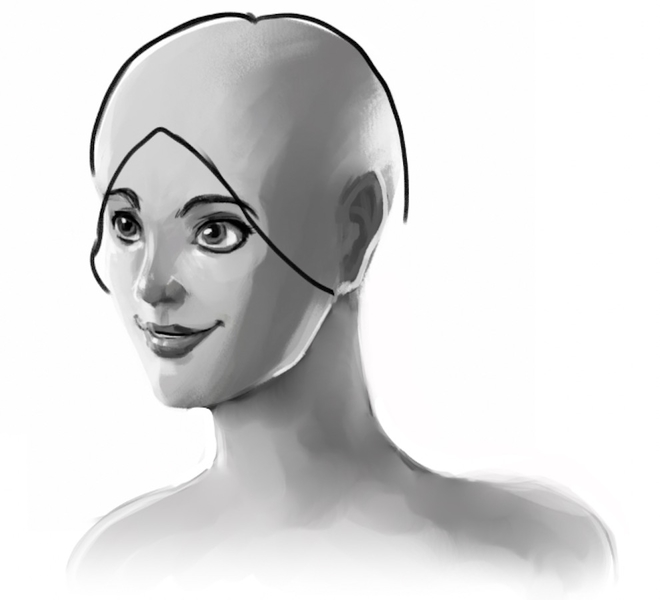
Drawing a large “V” helps you shape the hair at the front of your character’s face.
Next, extend the line at the back of the girl’s head, all the way down to the back of her neck.
Then draw a line from her right cheek to her right shoulder, like so:

The outline is almost finished!
To finalize the outline of the long hairstyle, let’s extend the two lines you drew in the previous step.
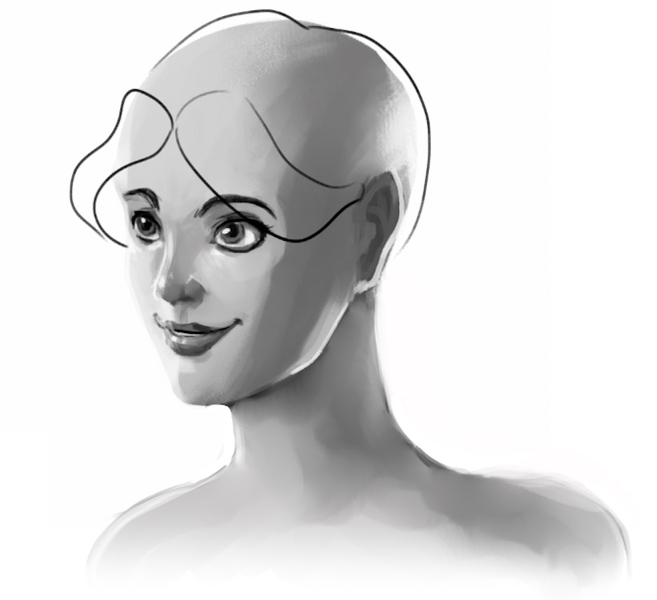
We want to draw a slightly wavy hairstyle, so instead of sketching straight lines, let’s add two soft waves, like this:
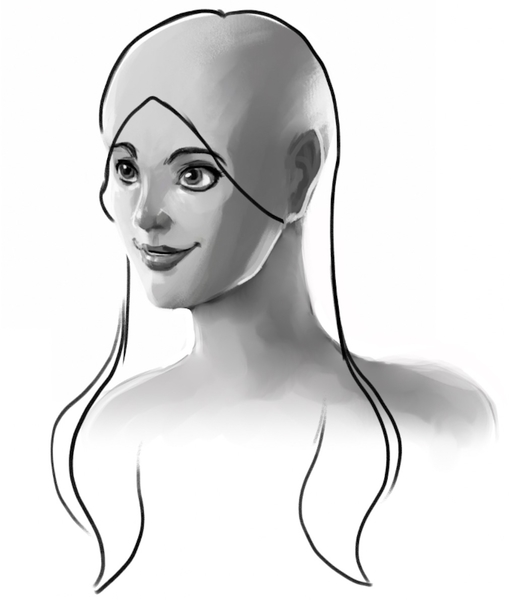
Soft waves add more volume to the hair.
2. Add The Details
Recommended tools: H and HB pencils
Before we start adding more strands of hair to the sketch, let’s add more waves at the bottom.
Then, connect the waves with the hair at the top of the girl’s head.
You can also use your HB pencil to add some hair strands, like so:
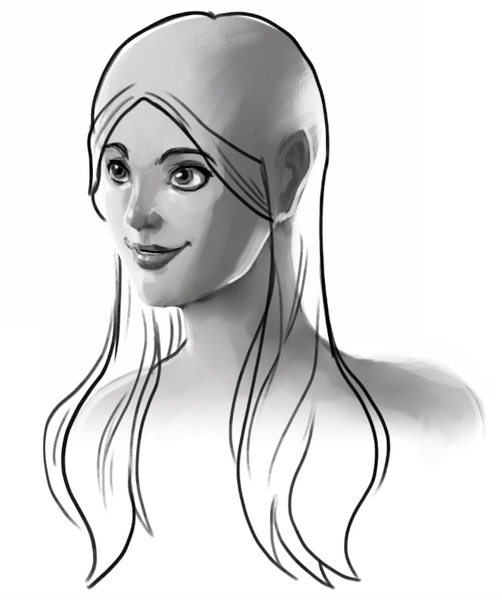
Add hair strands to enhance the hair’s texture.
Continue to add more strands around the girl’s head.
And don’t forget to add a vertical line across the top middle of the head to show where the hair parts:
Draw a line to show the hair’s natural part and keep adding the hair strands all over the head.
3. Shade Your Long Hair Drawing
Recommended tools: HB and 4B pencils, kneaded eraser
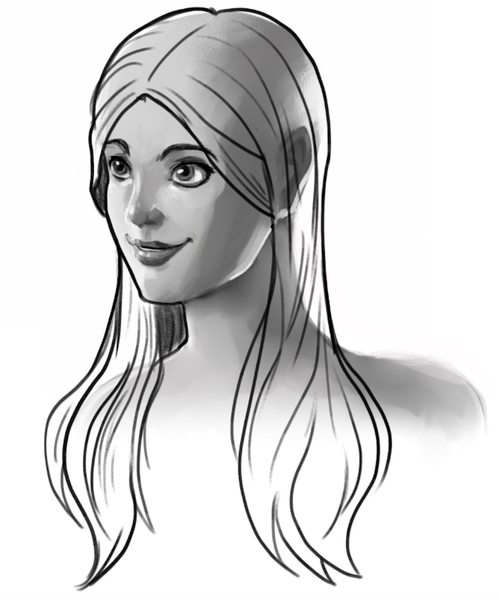
The final step to drawing a long hairstyle is to shade it and bring it to life with some grey hues!
We imagine that the light source is on the girl’s left, so we want to keep the hair on that side and at the top of the girl’s head lighter than the rest.
The strands on the right should be darker, like this:
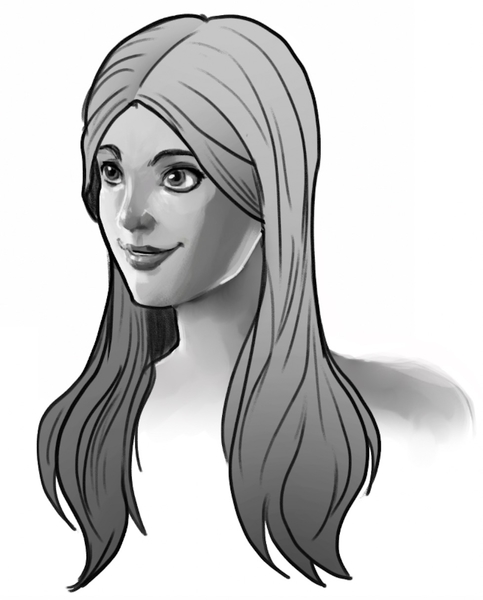
Before shading, decide on the light’s position.
To finalize the drawing, use your kneaded eraser to add some highlights to the hair — these are the areas where the light hits the hair.
For example, you can gently go over the area above the ears and just above the ends of the hair:

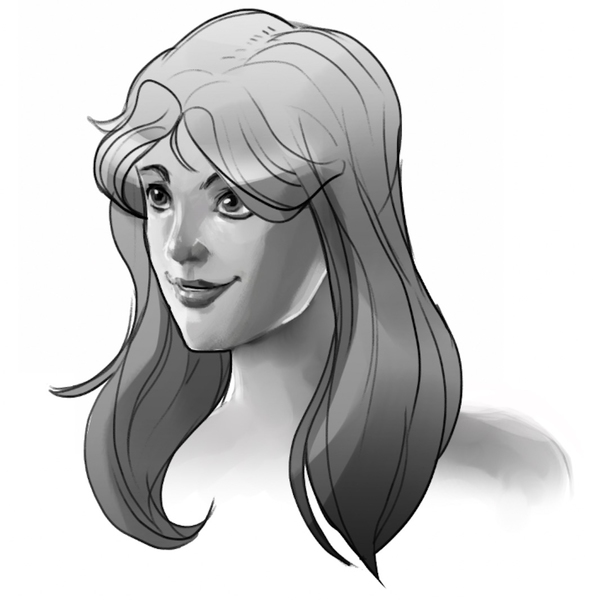
That’s a wrap on drawing long hair without bangs!
How To Draw Long Hair With Bangs In 3 Steps
Now it’s time to learn how to draw long hair with bangs!
1. Outline The Hair
Recommended tools: HB pencil
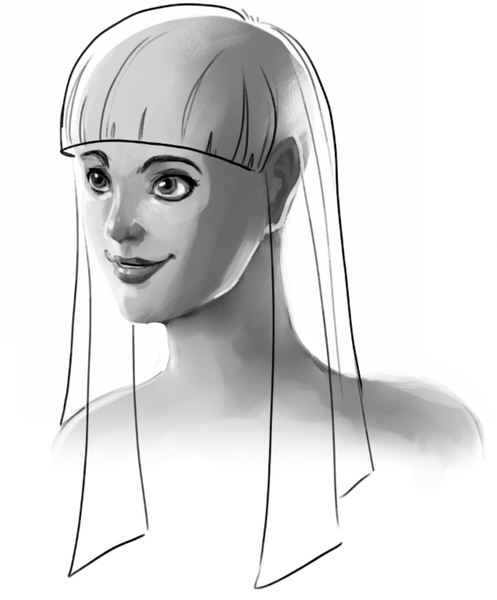
When drawing long hair with bangs, you want to start by outlining the bangs.
We’ll draw a character with long straight hair and full blunt bangs, so, we’ll first sketch a slightly curved line across the forehead, right above the facial features.
From there, let’s draw a line that’s parallel to the girl’s head and follows its shape. That line should touch the crown of the head, like this:
No matter the hairstyle, sketching elements one by one makes drawing easier.
Draw slightly curved lines on either side of the head, from the crown to the shoulder or below, to allow the hair to start taking shape:
Draw lines from the crown to the shoulders to create the hair outline.
Now, let’s add more elements to shape the hairstyle.
Continue sketching straight lines and connect them at the ends.
The lines should gradually become longer the closer to the front of the head you get.
Once you form the outline, you can slowly start adding hair strands, like this:
It’s time to add the details to the hairstyle!
2. Add The Details
Recommended tools: H and HB pencils
Continue to add the hair strands all over the head.
Then, draw two curved lines around the head — one from the crown and across the middle of the fringe. The other should split the bangs in two and stretch toward the back of the head, like this:
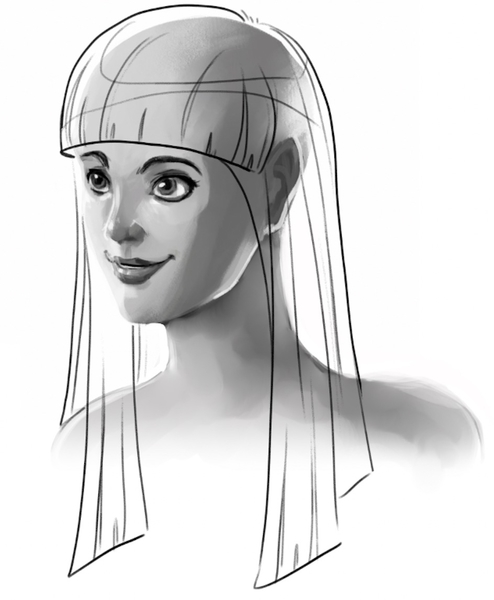
Adding the curved lines will help you shade your drawing in a sec!
4. Shade Your Long Hair Drawing With Bangs
Recommended tools: HB and 4B pencils, kneaded eraser
When shading your drawing, you can first color everything in the same shade of grey.
Then, use your 4B pencil to color the areas you just outlined in darker shades.
The part of hair that’s on the character’s right side is the darkest, so your drawing should look something like this:
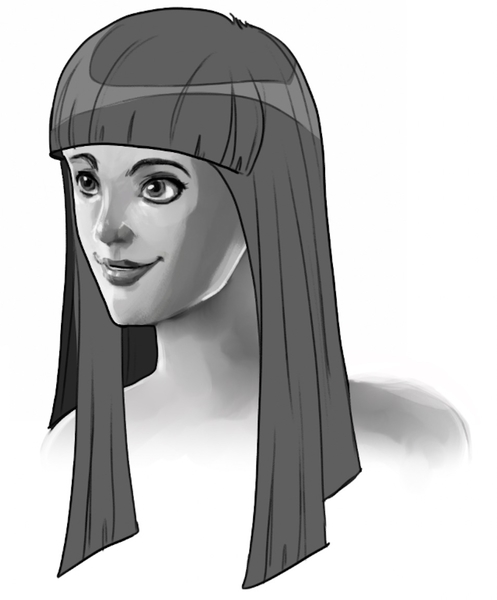
Combine different grey hues when shading your drawing.
To finalize the sketch, make the transitions between different grey tones softer. You can use your eraser for that:
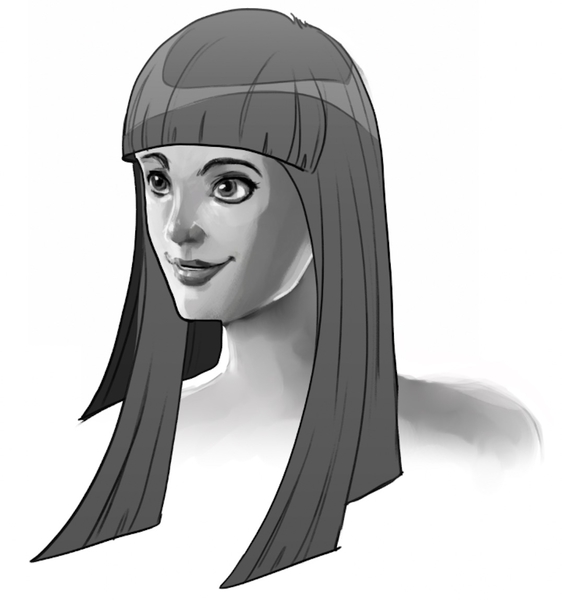
The drawing of the long hair with bangs is ready!
How To Draw A Layered Hairstyle In 3 Steps
The final hairstyle we’ll show you how to draw is layered hair with a soft fringe.
Ready to get started?
1. Outline The Hair
Recommended tools: HB pencil
First up, let’s outline the fringe.
To do so, draw two wavy shapes from the top of the forehead toward the ears:
Outline the fringe first when drawing a layered hairstyle.
Then, let’s add a line that follows the shape of the head from the front to the back.
Make sure that the line touches the crown of the head, like so:
Outline the hair at the top of the head.
Now, draw the hair on the sides.
Start from the middle of the head, and, using curvy strokes, draw two 2D shapes that softly fall from the girl’s shoulders to the front of her body.
For the hair parting, you can sketch short horizontal lines in the middle, like this:

Layered hairstyles are super voluminous!
2. Add The Details
Recommended tools: H and HB pencils
Now that the basic outline is ready, let’s enrich it with details.
Since layered hairstyles are rich, add a lot of hair strands all over the outline.
Make the hair on the sides more voluminous by adding the lines that have the same wavy shape.
Add some stray hair here and there (we added some around the fringe and on the right side of the girl’s face), so that the hair appears livelier:

Don’t be scared to add stray hair!
Now, let’s use an HB pencil (or you can apply more pressure to your pencil of choice) to go over the outline and make the lines darker.
You can also add a short strand of hair in the middle of the fringe, like this:
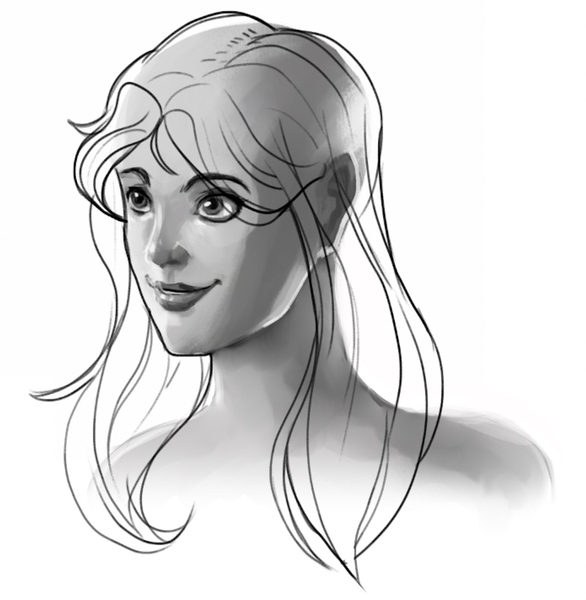
Next comes shading the layered hairstyle!
3. Shade Your Layered Long Hair Drawing
Recommended tools: HB and 4B pencils, kneaded eraser
To shade your sketch, you can first color the entire hair in a lighter shade of grey with your HB pencil:
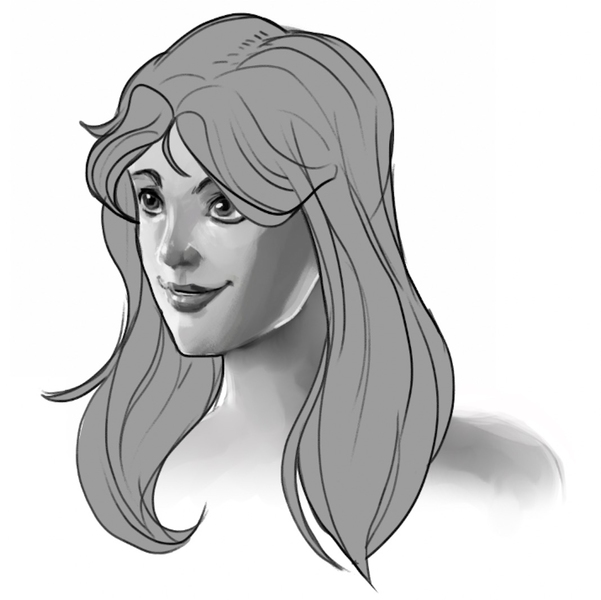
Start by shading the hair in one grey hue.
Use a 4B pencil to make the ends of the hair darker.
As usual, you can also play with your eraser to highlight parts of the hair, such as the top and the fringe:
The layered hairstyle is finished!
Finished Your Long Hair Drawing? Try These Next!
Once you perfect your long hair drawing skills, why don’t you keep your creative juices flowing?!
Explore these beginner-friendly guides:
- How to draw bangs
- How to draw a dragon
- How to draw a dog
- How to draw a person
- How to draw feet
- How to draw eyes
- How to draw fire
- How to draw a unicorn
- How to draw fish
- How to draw a butterfly
And many more!
Drop us a comment below and let us know which tutorial you’d like to see us cover next!